The answer
is not straight forward.
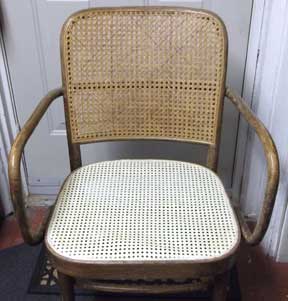
There are basically three types of woven chair finishes.
There are basically three types of woven chair finishes.
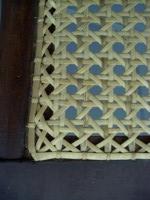
1. Pre-woven cane attached to the chair with a reed spline. See How to Story below.

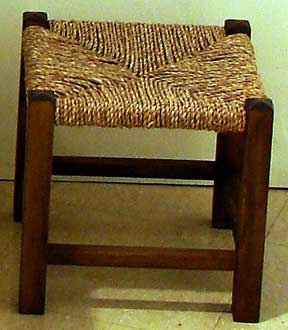
3. The weaving is hand woven in a pattern of narrow material directly attached to the frame.
For a better view of all of these types of weaving for chairs check out the web site for the Wicker Woman. She has lots of information about the types and styles of chair weaving that can help you identify the type of chair you want to have repaired.
Some members of the Nova Scotia Basketry Guild do reweave chairs and have the knowledge to help you with your repair project. We do have a small database of people in Nova Scotia who do reweave seats. Different people do different types of repairs so please send us a photo and/or a description of what you are trying to repair and where you are located and we will try to help you. Also from time to time there are local classes available. Contact Us.
A photo story of how to replace a prewoven chair seat.
This story
is based
upon one experience that did work. There are several sites on
the internet that also explain how this is done. We used the
information from Wickerworks and How Did I Do It .
The Prewoven Cane Webbing and Reed Spline came from Maritime Hobbies and
Crafts, 1521 Grafton Street, Halifax, Nova Scotia. The
instructions on the packaging were good though they did not mention the
following idea which we found on one of the web sites. It was
suggested that you should have at least a one inch sag in the cane
before tamping the cane into the groove and hammering in the spline.
This is because the cane shrinks after drying and leaving the
sag in the wet cane gave us a beautiful smooth seat base with a small
amount of give after everything was dry.
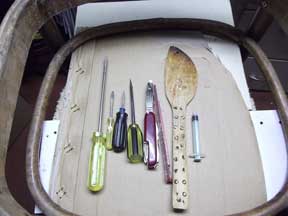 A
selection of tools used - narrow awls and screw drivers (to remove the
old spline), pen knife and sandpaper stick (to clean and smooth the
groove),
wooden wedge (to force weaving into groove), syringe (to apply white
glue to groove and weaving), also required is a plastic or wood
mallet to hammer the spline into the groove, and a sharp utility knife.
A
selection of tools used - narrow awls and screw drivers (to remove the
old spline), pen knife and sandpaper stick (to clean and smooth the
groove),
wooden wedge (to force weaving into groove), syringe (to apply white
glue to groove and weaving), also required is a plastic or wood
mallet to hammer the spline into the groove, and a sharp utility knife.
Most of the
chairs of this type are held together with White or Carpenters glue.
Both of these glues are water soluble. Starting at
the gap where the old spline started and finished we slowly added water
to the groove and used the awls and screw drivers to lift the old
spline and weaving out of the groove. Some sites suggested
the quickest way was to use a router to clean out the groove.
We did not have a router!
After
removing all the old spline and weaving rinse out the groove to remove
the last of the glue (this is a sticky job!). Then let the
area dry thoroughly. Once dry, scrape any remaining bits of
glue or weaving from the groove. Then using the sanding stick (glitz
stick) smooth the groove to receive the new material.
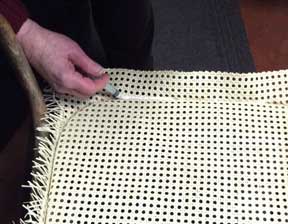
Having four
hands was very useful at this point, to help keep the damp
material (15 minute soak in warm water) in
place and to keep the one inch dip in
the centre of the material. Starting at the front of the seat then
moving to the back of the seat force the material down into the groove
with the wooden wedge and be careful not to break any of the
weaving strands. Once the front and back are in place tamp down the
sides and then the corners. The material must be all the way to the bottom of the cleaned
groove.
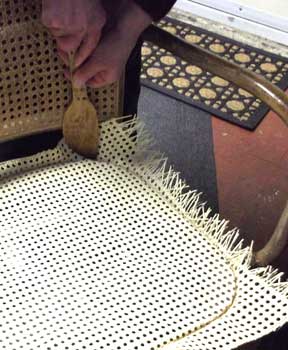
Using the syringe filled with white glue work your
way around the the groove -- be generous, any extra can be
wiped off later. Now sit back and wait for five minutes and
let the glue soak into the weaving. At this point start the spline
soaking in warm water.
The spline
is sold seperately and in several sizes so you need
to know approximately the size of the groove you have and buy a
spline that will fit snuggly and smoothly into the groove.
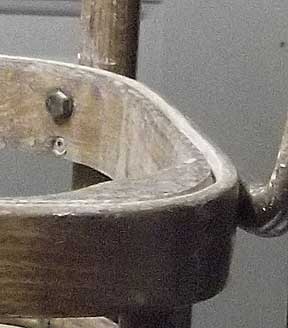
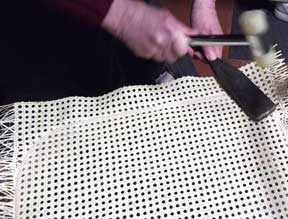
The spline is rounded on the upper surface and V-shaped on the lower surface which fits into the groove. Because the spline is damp when you are placing it into the groove, it is important to hit it with something that will not damage the curved upper surface. We used a plastic mallet and a broad flat rapping iron .
Start and stop the spline at the back of the seat, where it will be less visible. The spline must be flush with the frame of the chair by the time you are finished.
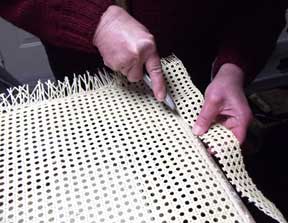
Now
for the final step. You have got the spline settled into the
groove smoothly and now you must take a clean sharp utility knife and
trim off the excess weaving very close to the spline. (One web
site warned us not to cut ourselves as blood is very difficult to get
out of the cane weaving!)
A day or two later when the cane has completely dried, take a very fine sandpaper and smooth off any rough edges that might have been left from the trimming.
A day or two later when the cane has completely dried, take a very fine sandpaper and smooth off any rough edges that might have been left from the trimming.
The chair was finished and looked great. We went to the Wicker Woman's web site for information on how to stain and maintain the webbing.