|

|
|
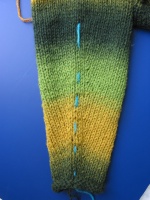
Blue marker yarn is used to show the sleeve increase frequency; notice the short row wedge at the top of the sleeve, the invisible side start and the row that runs from the lower front to lower back.
|
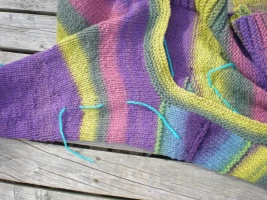
The arrow shows the center front three stocking stitch rows of waste yarn (turquoise), which will later be removed to attach the button band.
|
The arrow shows the center back opening waste yarn (turquoise a single row) and at the shoulder line you can see the end of the 3 rows of front waste yarn. One continuous piece of waste is used for this insertion.
|
|
|
|
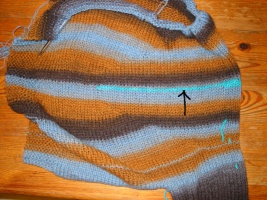
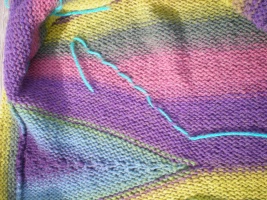
Shows the nine short row turning points in the back of this sweater. By using markers it is easy to count, compare and match the short rows from side to side and back to front.
|
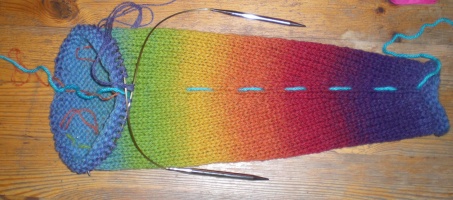
Two circular needles are being used for the sleeve, to allow working the smaller number of stitches without double-pointed needles.
|
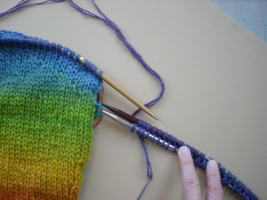
Sleeve increases are marked with a length of waste yarn.
|

|
|

|
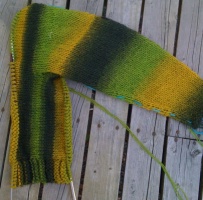
Two sleeves: increases/ decreases can be compared using marker yarn.
|
Shoulder shapings: at the points where the waste yarn enters or leaves the fabric.
|
Lucy's mum wearing her Venus Rising cardigan
|
|
|
|
One yarn being used to mark a series of short rows
|
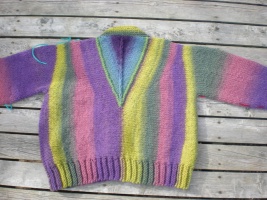
Venus Rising showing the vertical stripes and how the short rows narrow the stripes at the shoulders
|
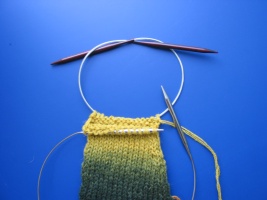
A completed sleeve with short row shaping with half of the stitches on each needle. The yarn will now be broken in order to start the tubular cast-on for the side.
|
|
|
|
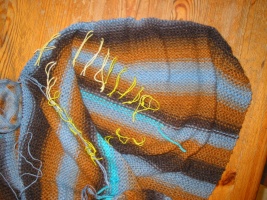
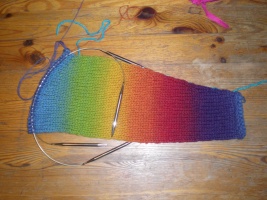
Sleeve increases and sleeve head short rows, shown marked by various pieces of waste yarn.
|
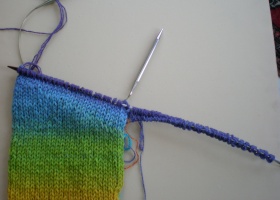
The tubular cast-on has been made onto Needle A (Dark wood) and Needle B (Shiny); the last stitch cast on is on Needle B and is quite loose. It may be helpful to pull the needle tip of B further to the left to prevent any of the cast on stitches from slipping off the needle.
|
Continuing on Needle A the working yarn is knit across the first half of the sleeve stitches. Needle B has been tucked behind the sleeve to stabilize the join area.
|
|
|

|
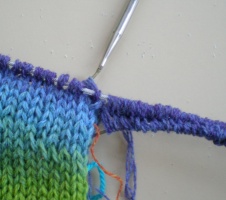
Needle A knitted across the first side of the sleeve.
|
Detail of side/sleeve junction; yarn has continued across the sleeve on Needle A.
|
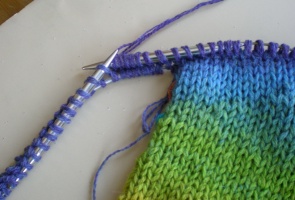
The second side of the sleeve has been worked and the working yarn is about to be knitted into the last stitch cast on and along Needle B. Notice how loose this last stitch has become but it can be adjusted by using the yarn tail later.
|
|
| The working yarn has been knit across the second side of the sleeve and part way along Needle B into the cast on edge. Any mis-mounted stitches in the cast-on may be corrected as you work.
|
